Well the last couple weeks I just wanted to post some of the fun things I tackle. I wish I knew how to video things for ya, however, that is still taking some time to learn. In the meantime, I have written and posted some pictures about my last project of shelves in rec room and laundry room. Now this week I thought my mom needed a microwave cart as it was sitting on her counter and in the way really. I wanted to buy her something to put together but had a hard time finding the right size and convenience. Her microwave is very small and so is her apartment. So I looked online and found some easy designs that i thought I could copy and it would either be cheaper or the same price.
so i decided to use two of those $10 wooden boxes you can get at Walmart or Home Depot.
I grabbed a box of #8 1 1/2″ and a box of #8 1 1/4″ wood screws
4 small wheels
and three 1 x 4 x 8′ pine boards
I only needed my miter saw, drill, measuring tape, and pencil.
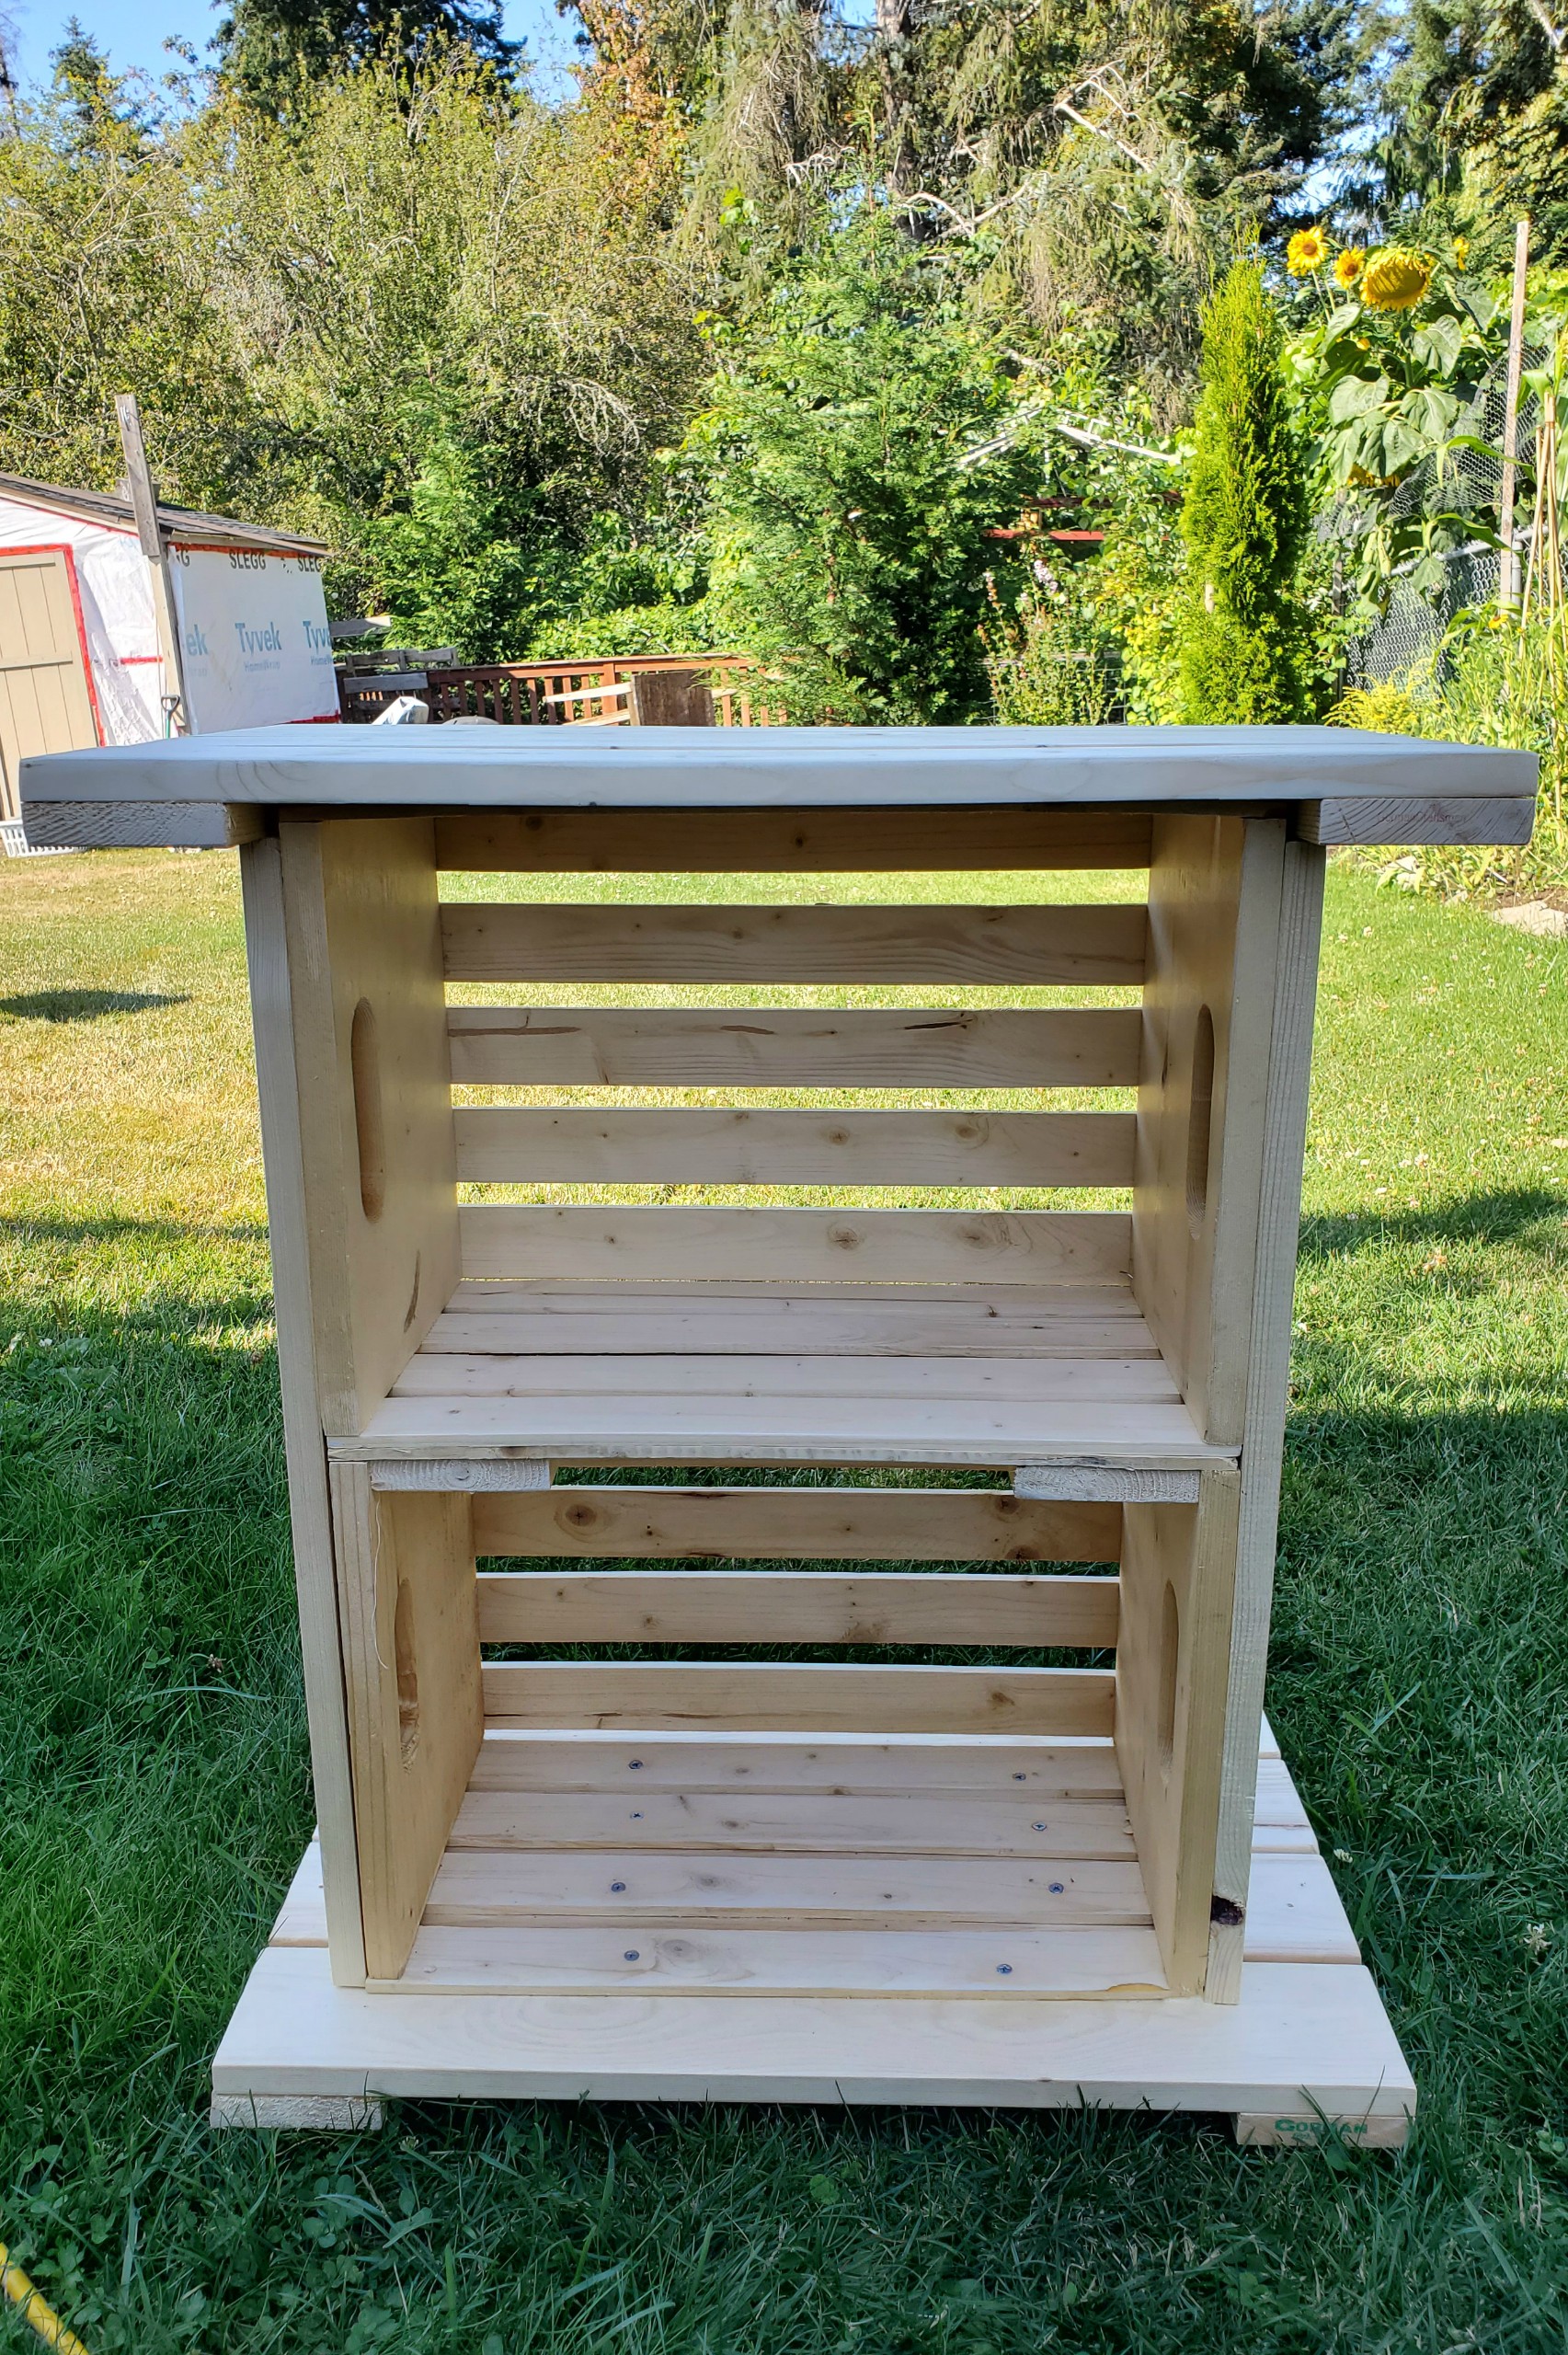
I started by figuring out how big we wanted the cart. We wanted something sturdy and I had these boxes which were 12″ x 18″ and so decided after taking the measuring tapeto the location the cart would live, on 14.5″ x 24″ x 30″


I decided to lay it out with the boxes and move them around trying different variations. Mom and I decided we liked this layout the best and it was the easiest to reinforce.
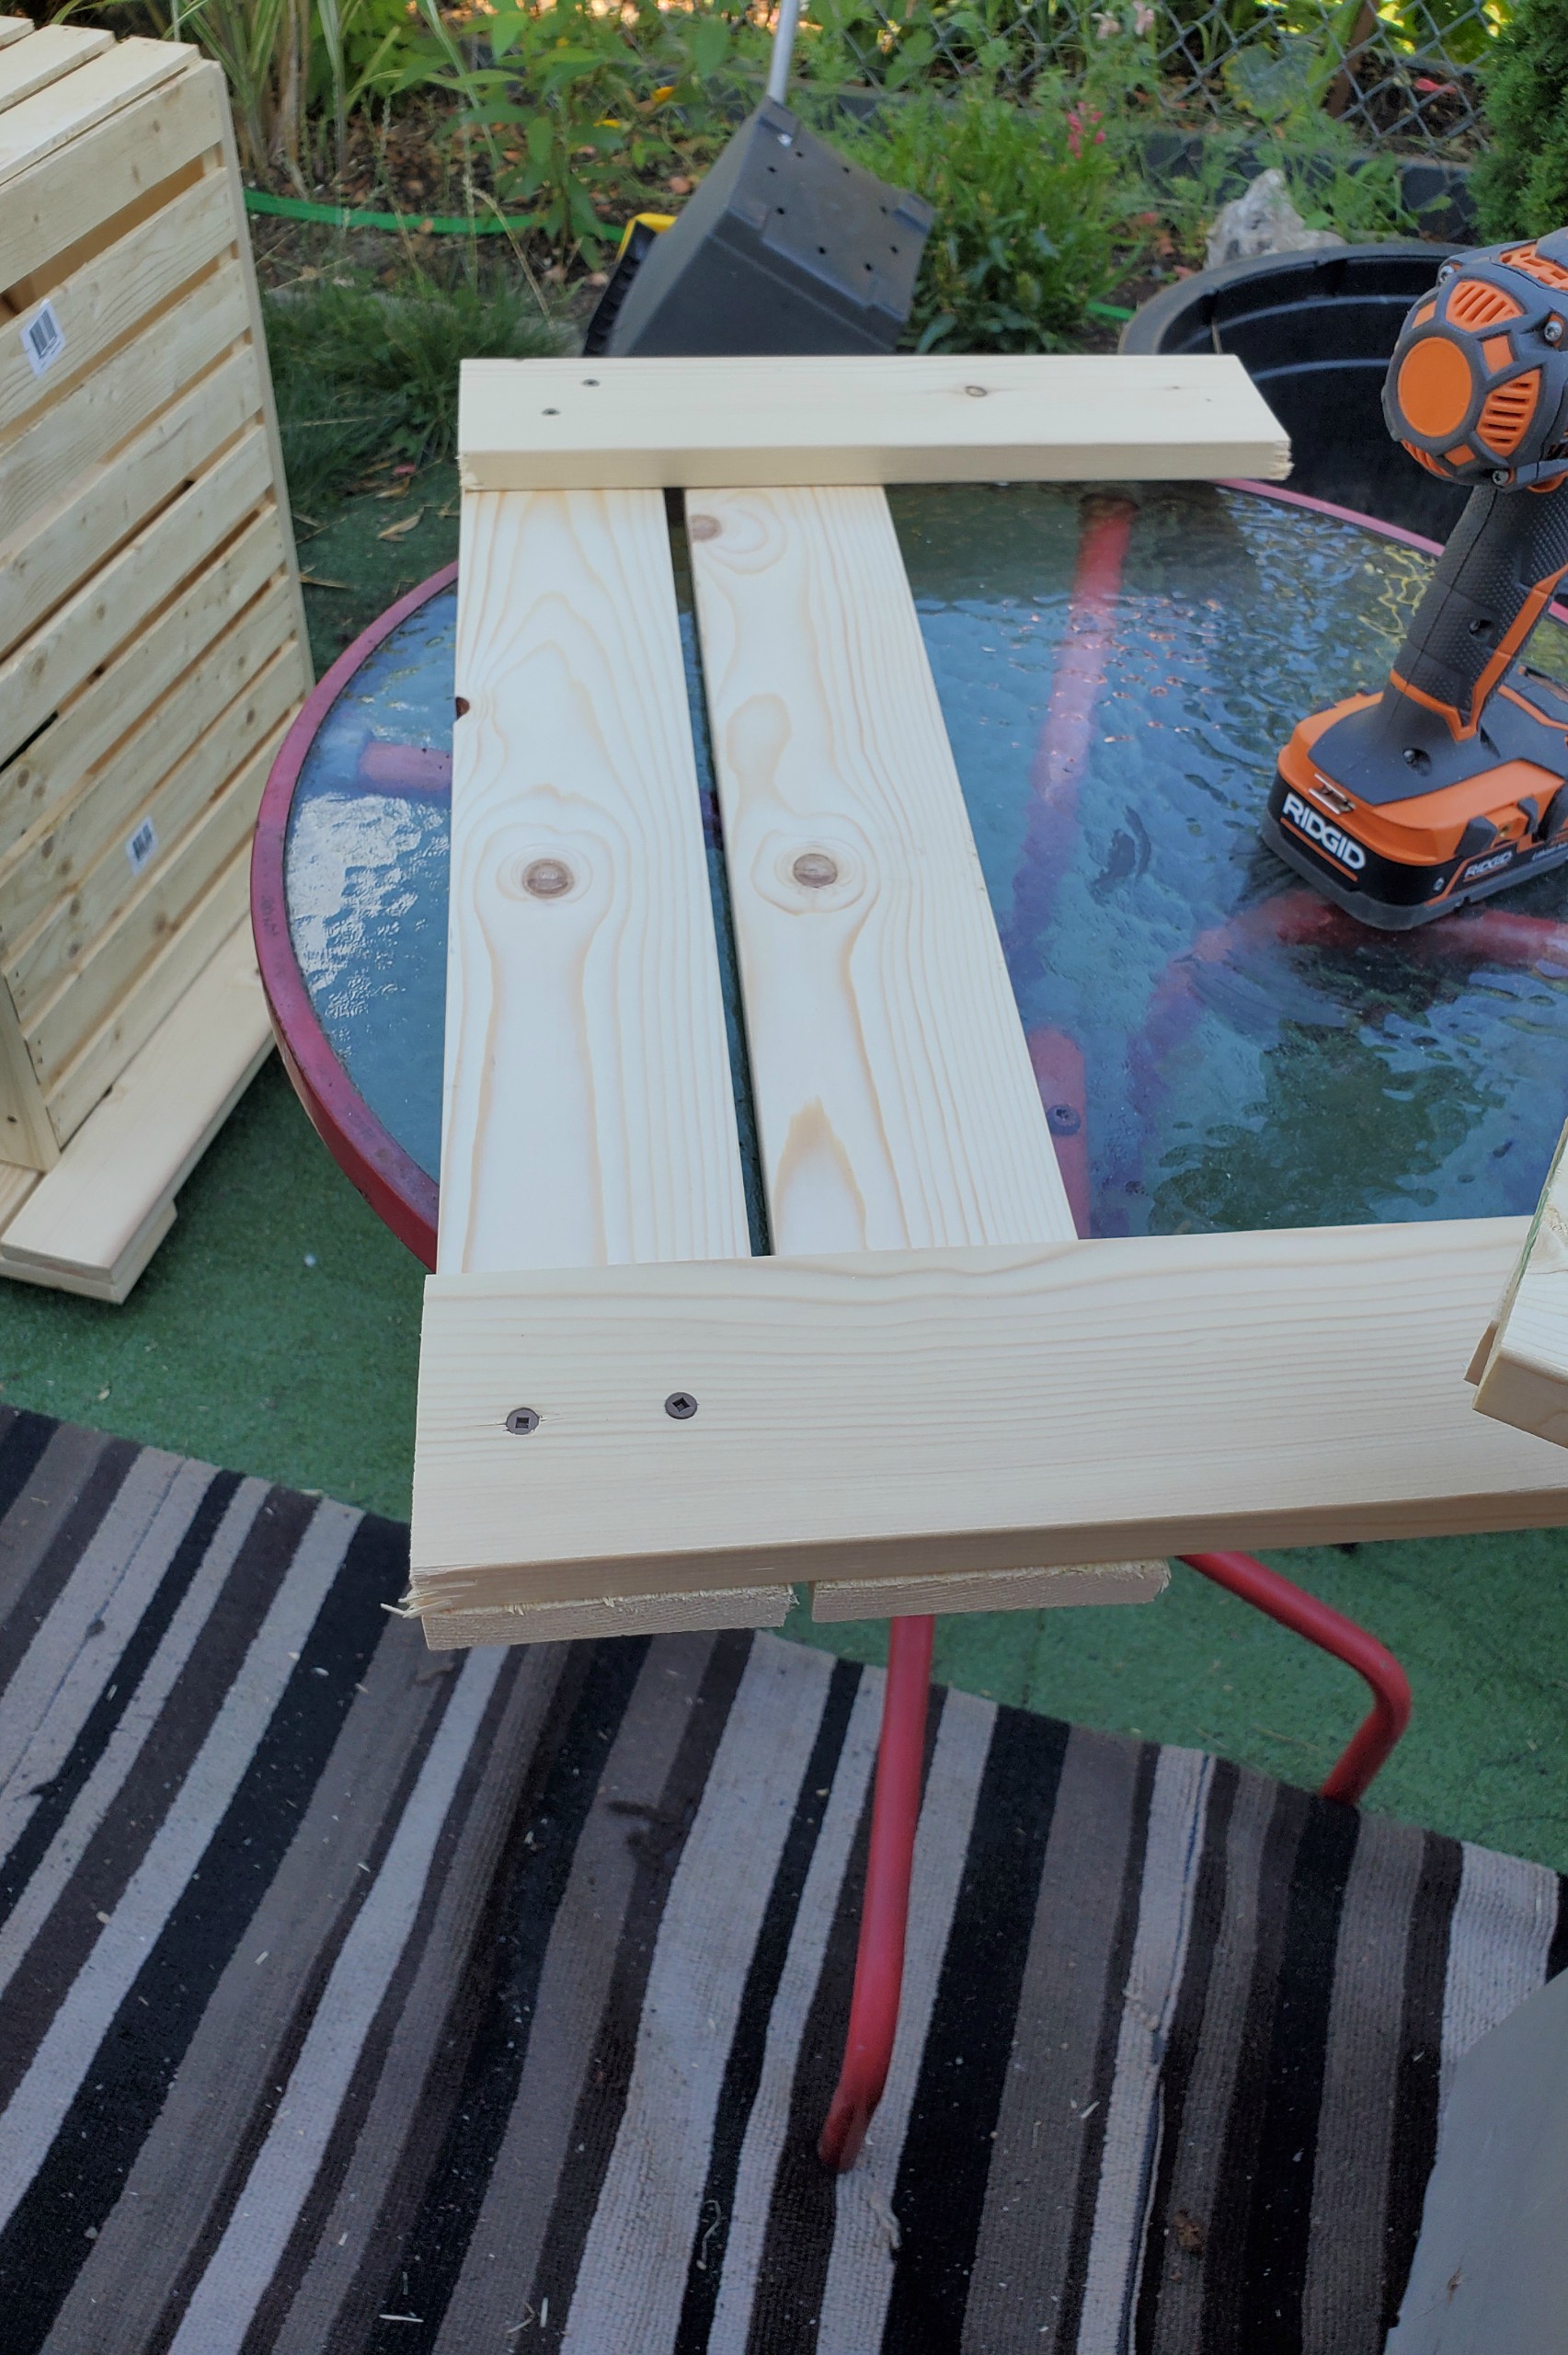
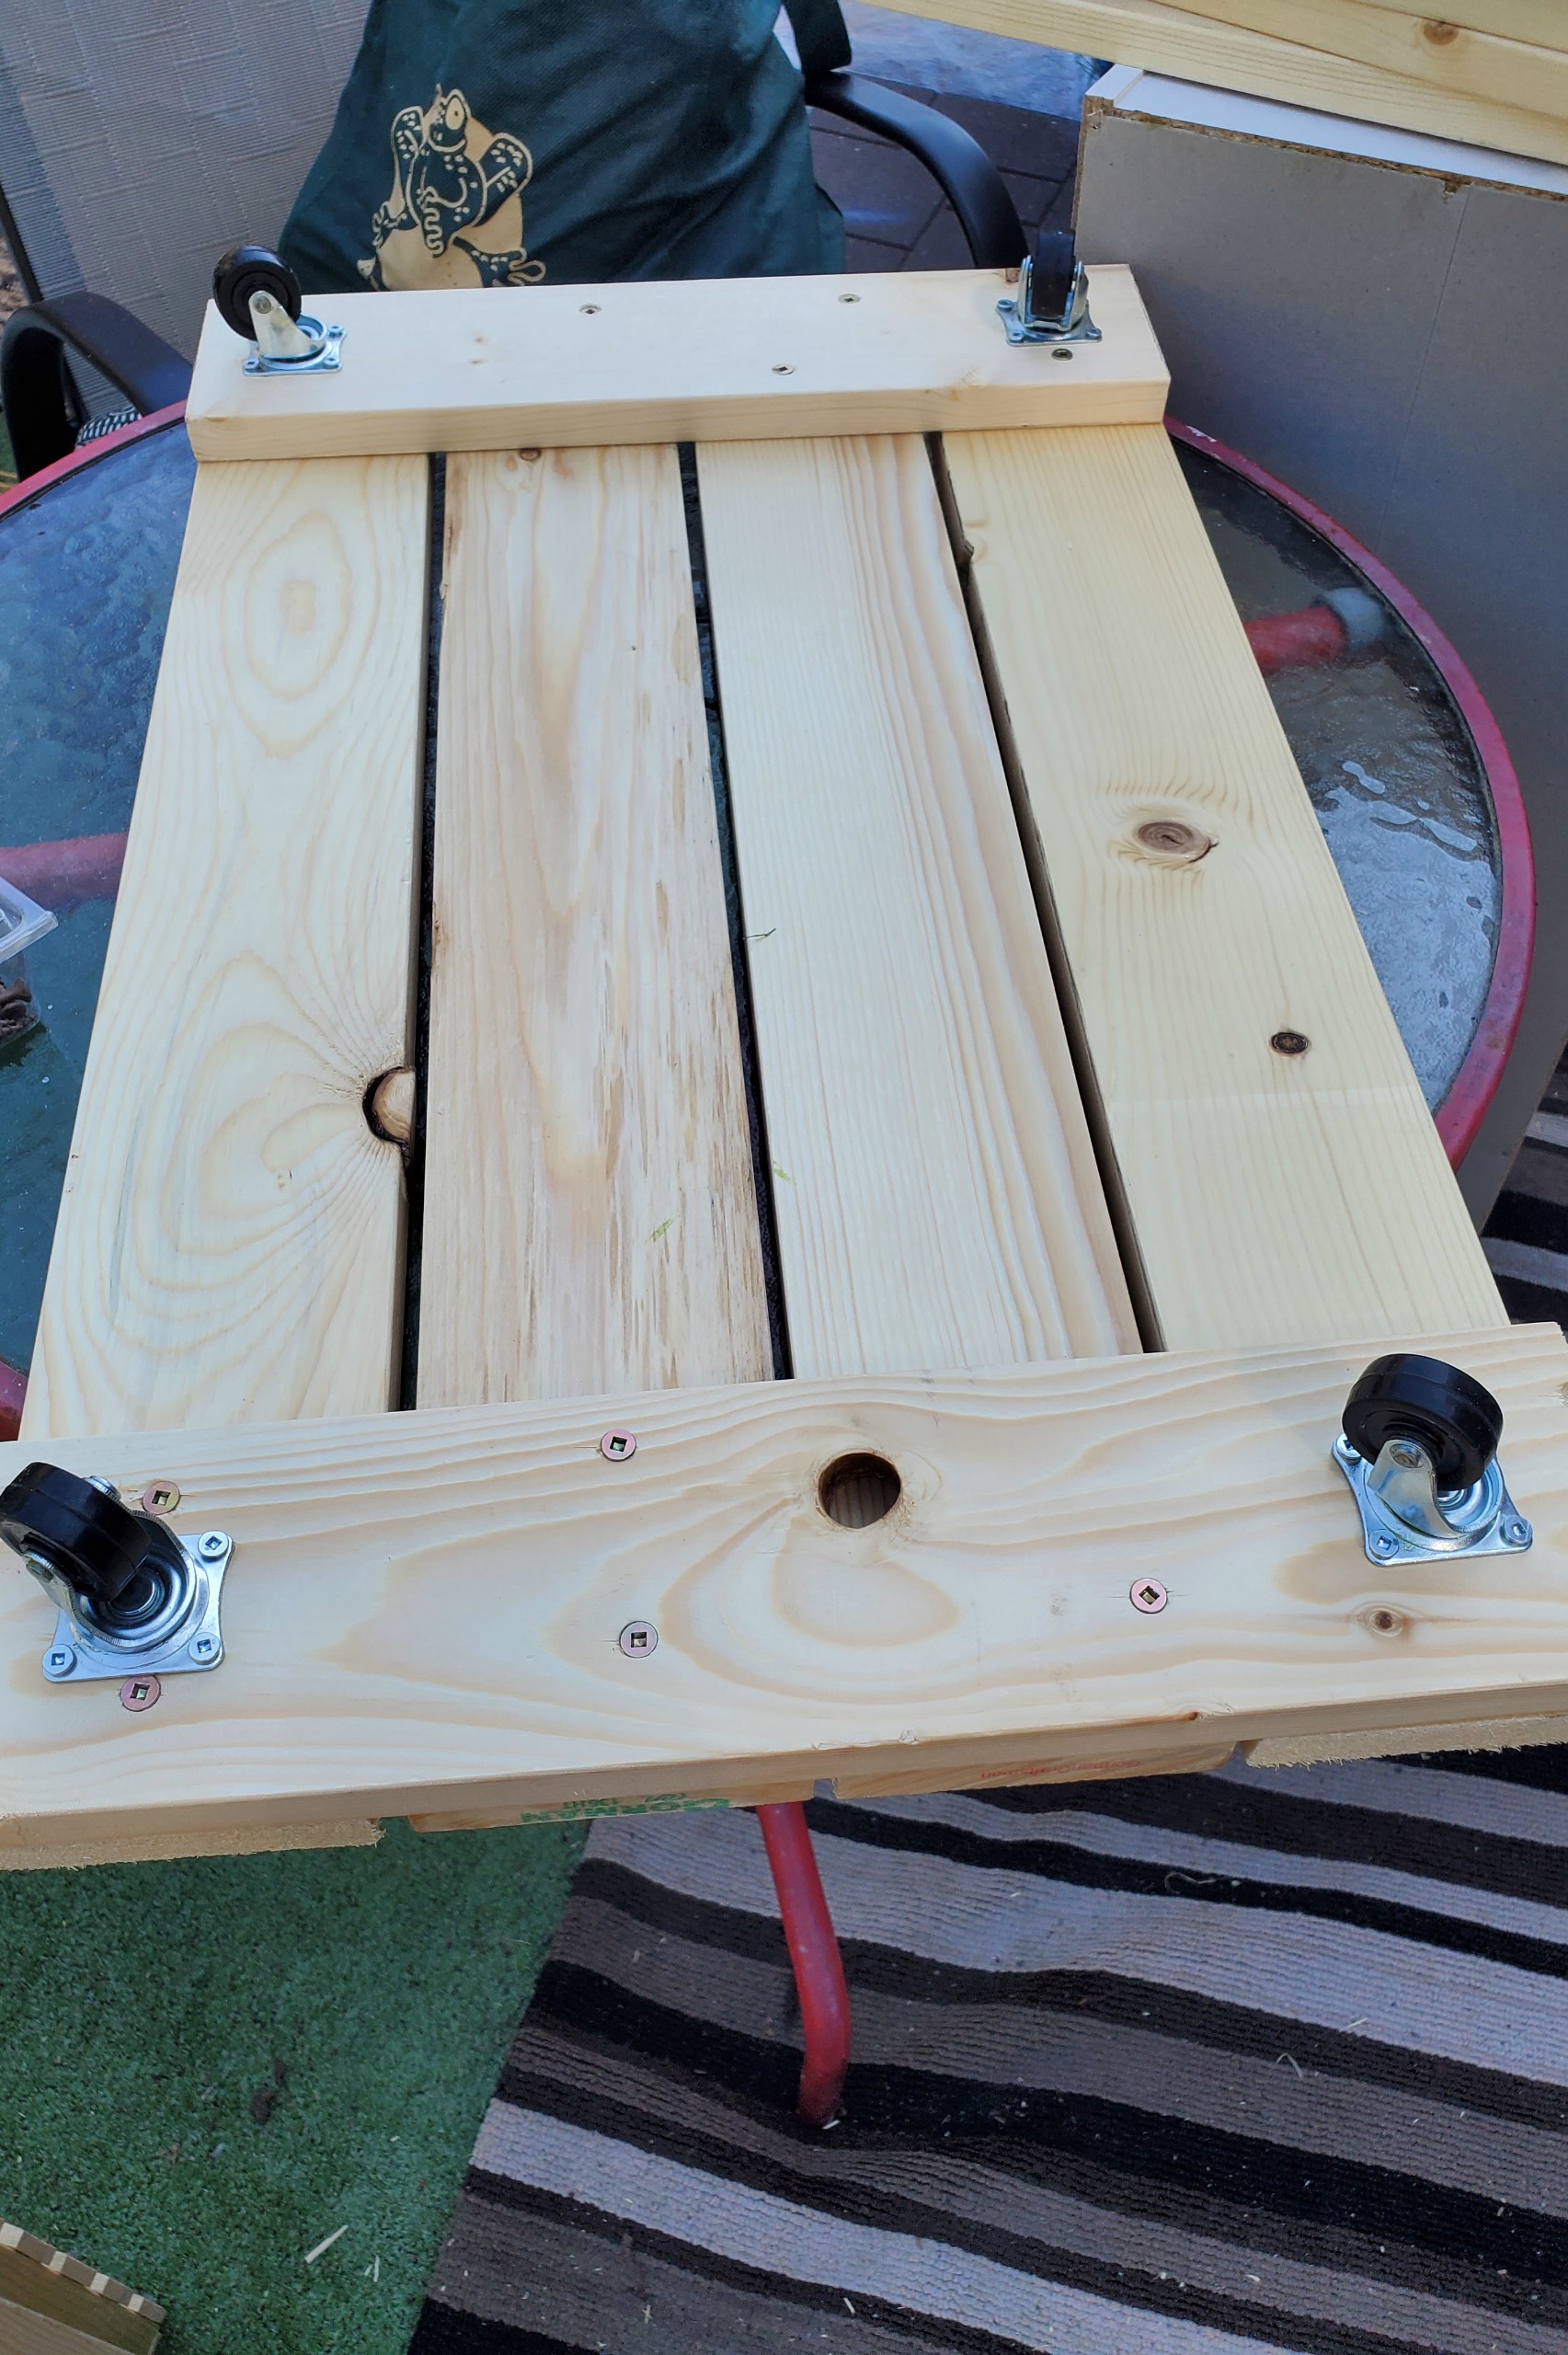
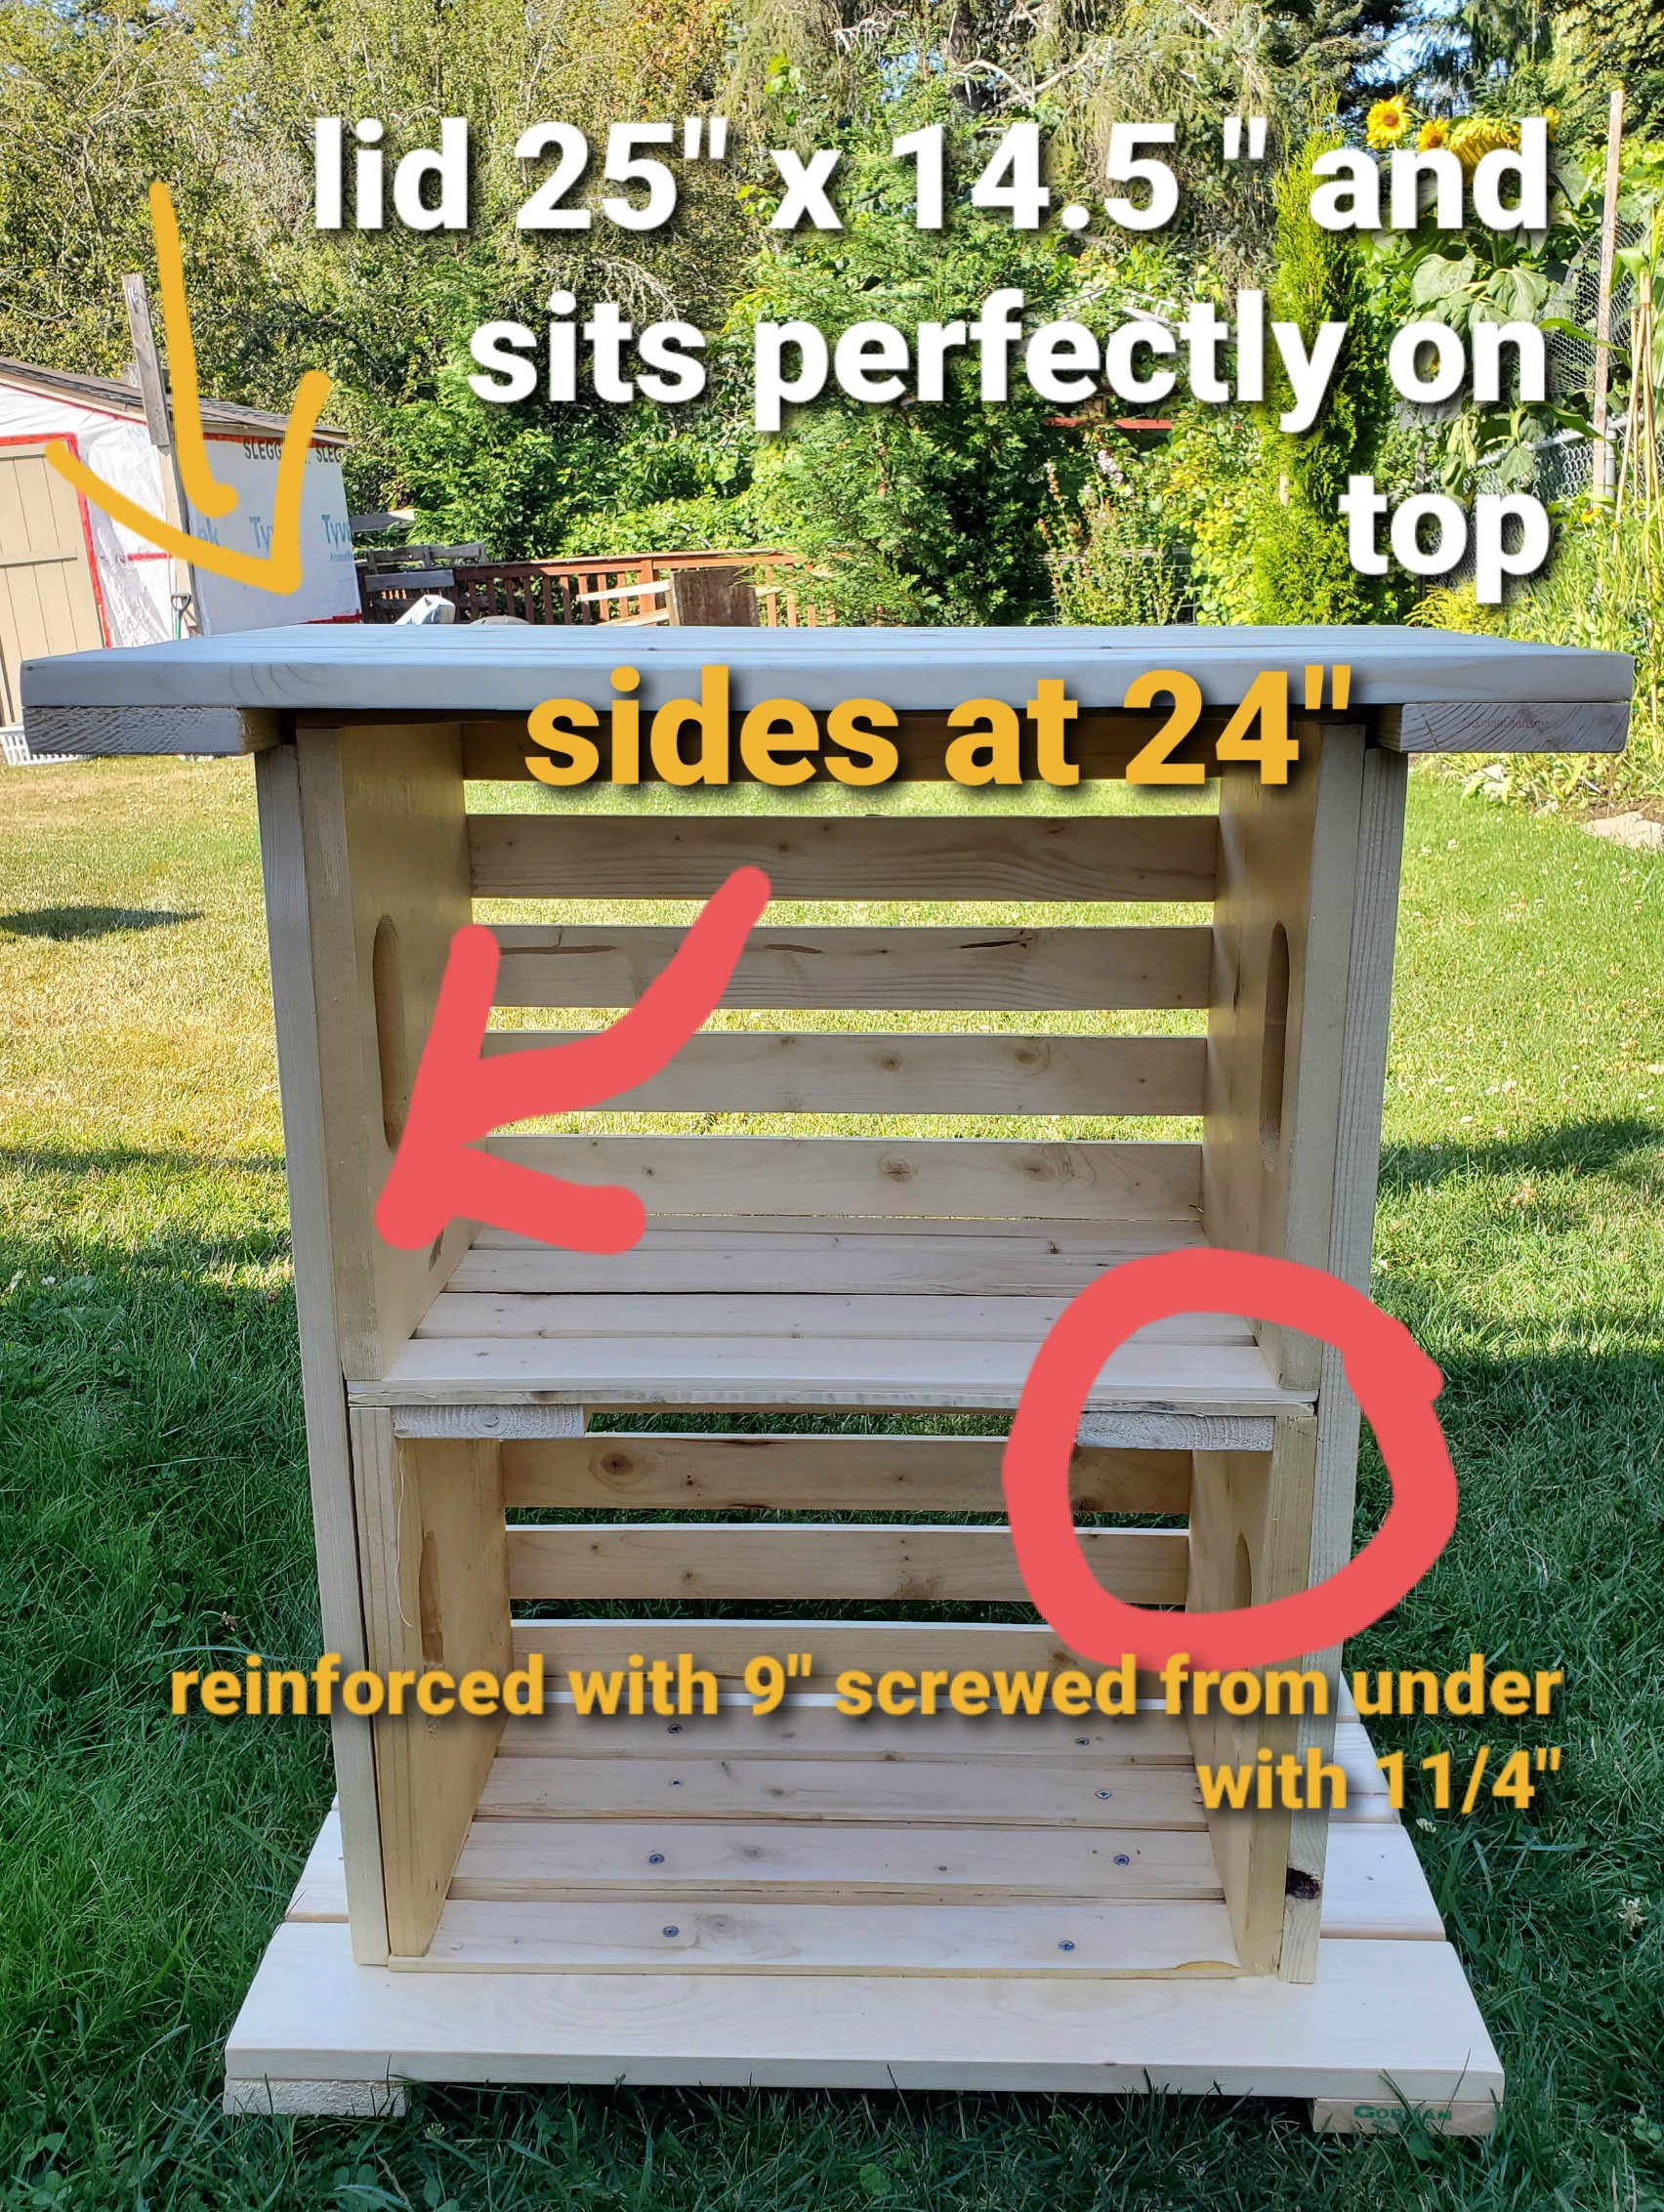
So I cut all the pieces for the bottom. I measured 4 at 24″ and 4 at 25″ and 4 at 14.5″ for the width. i laid them out and literally just screwed them to the cross piece.
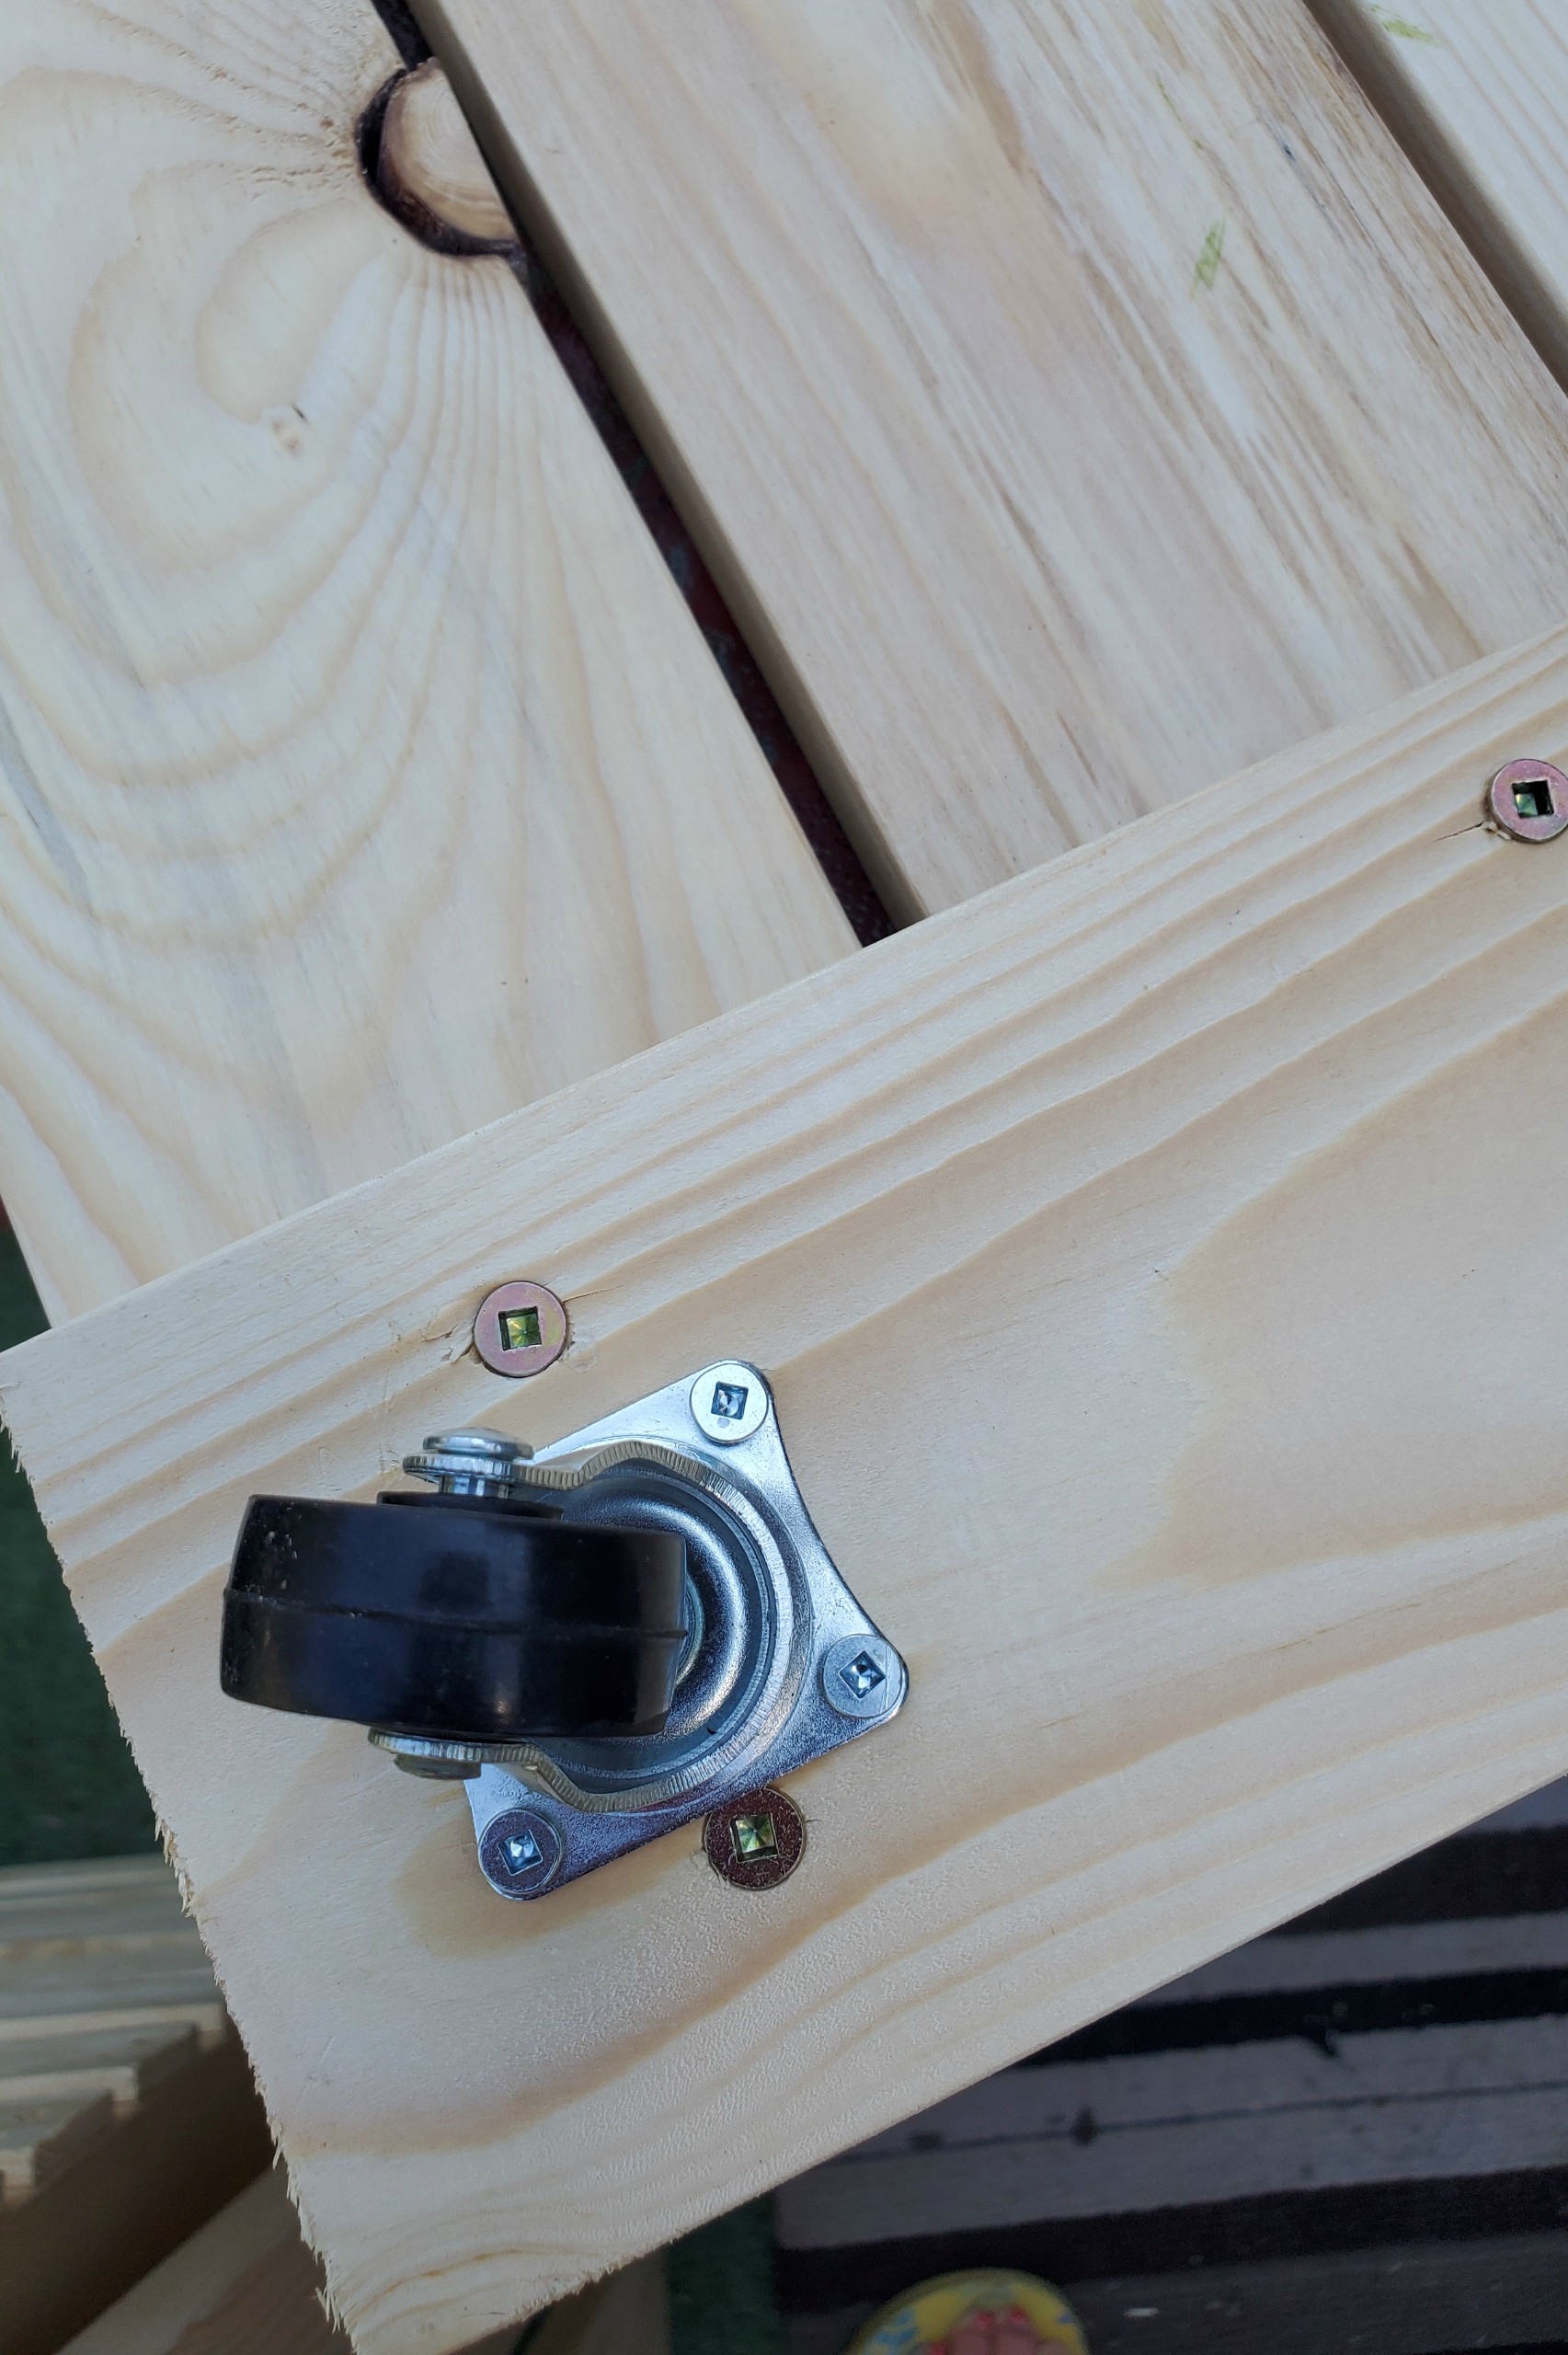
Once i had the bottom built, I screwed on the four wheels on each corner. now a good carpenter probably would have measured exactly 1 inch from the corner and made sure each corner was equal, but honestly, I just eyeballed it.
then I laid the two boxes on top and took 4 24″ pieces and screwed them onto the sides to reinforce the shelves it was going to provide. I made the lid, or counter part using the 25″ pieces because then it would fit over the reinforced sides and was easier to screw together.
Sorry the photo of the sides is not here but you can sort of see them on the sides. I also measured a couple 9″ pieces and reinforced them under the main shelf so nothing would crash through.
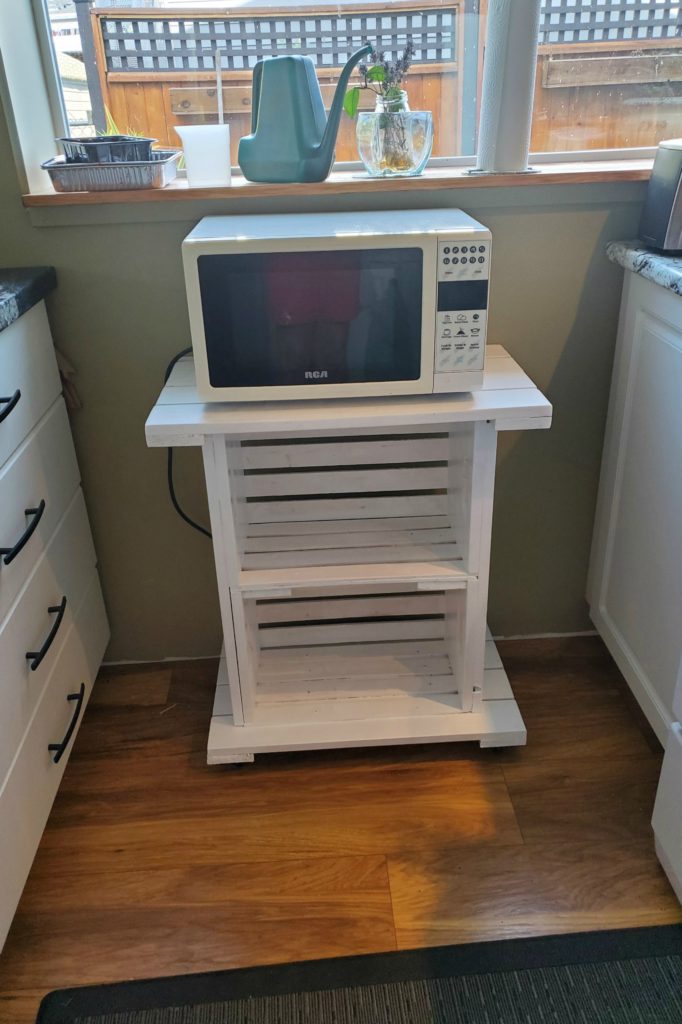
well it was looking fairly good and decided to add a coat of paint. I had white leftover, and didn’t bother to prime it. It gives it a bit of a cottage beach look.
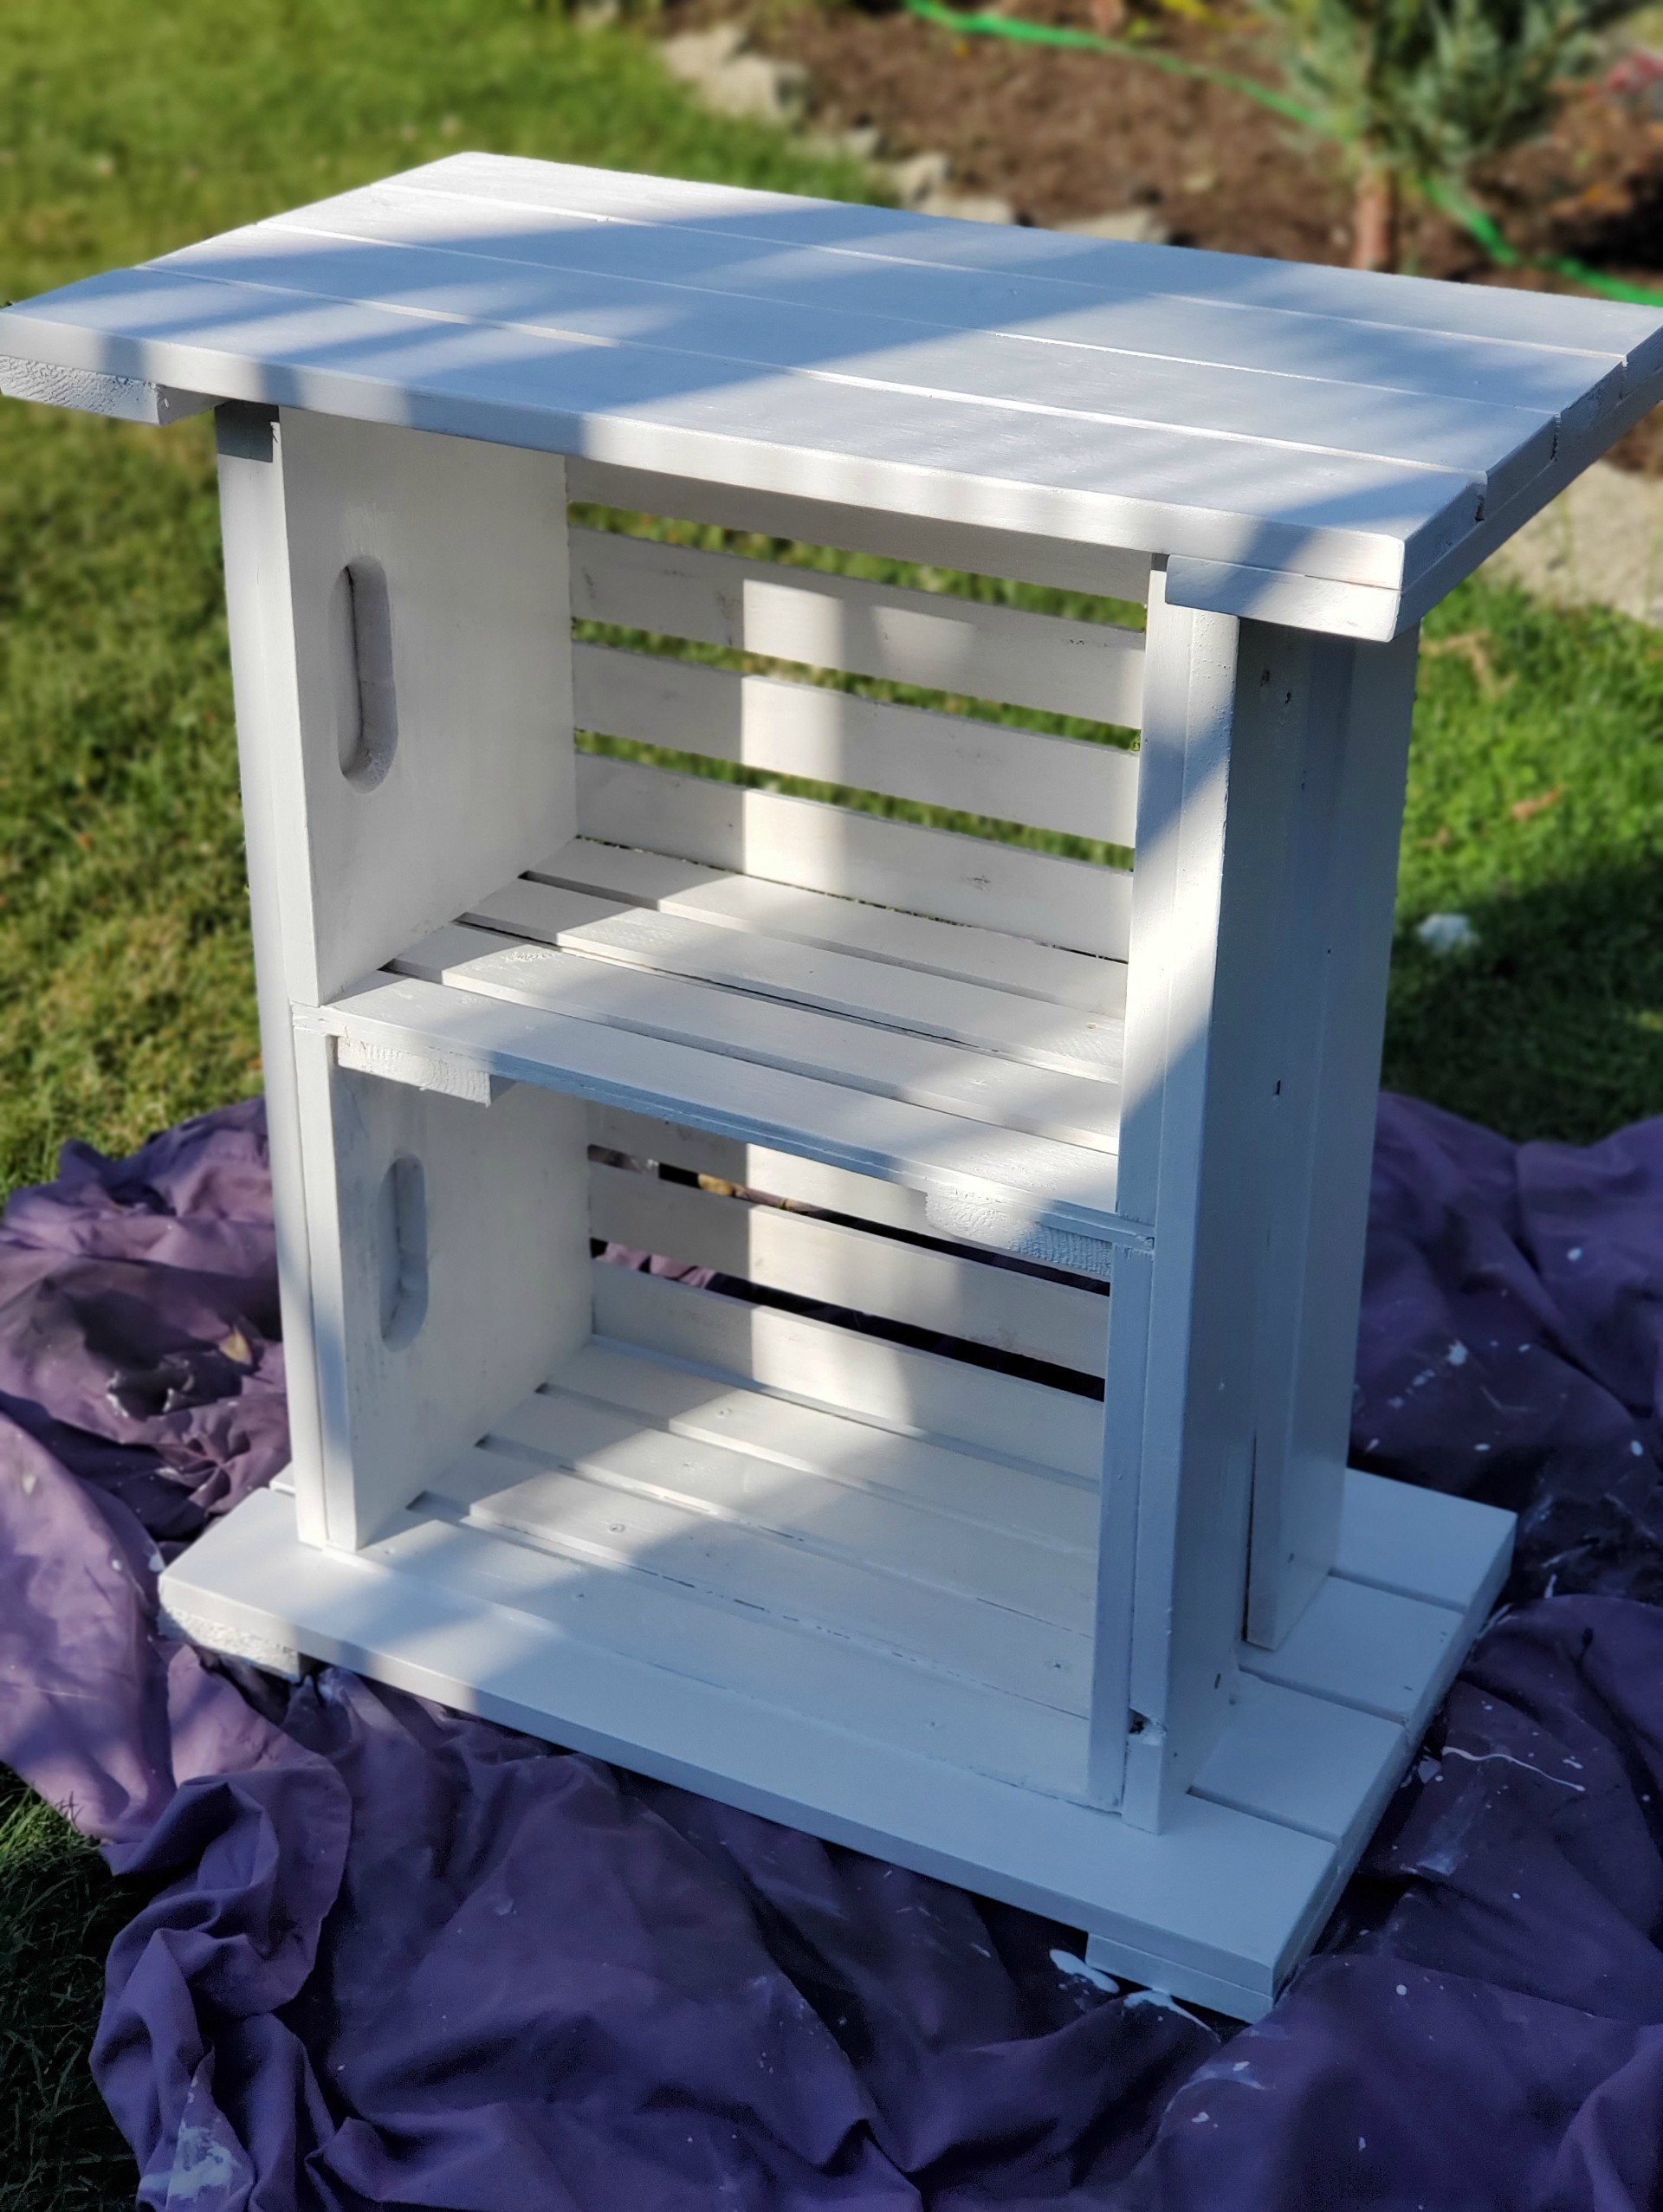

and viola, the finished cute cart that cost me $30 and my time.
If you have any questions about this project, please don’t hesitate to ask below and i will do my best to assist. Don’t forget to like my post and Facebook page. Share on Twitter and Instagram for any other nonsense i get up to.
In the meantime, stay real, stay, positive and never give up.